I never install toolchains globally on my systems. Instead, every project comes with its own nix file that describes the complete development toolchain versions and dependencies. This way, fresh checkouts always build the same way on every machine. This week I would like to show you how I set up a C++ project with the Qt Quick framework, and how to package the app and make it runnable for other nix users.
Nix typically allows you to run
nix-shell -p someTool someOtherTool… to download everything and put you in a shell where everything is as if you had these tools installed. This time, I wanted to run Qt Creator to fiddle around with some Qt Quick ideas.
Getting Qt Creator Up and Running
For that purpose, running
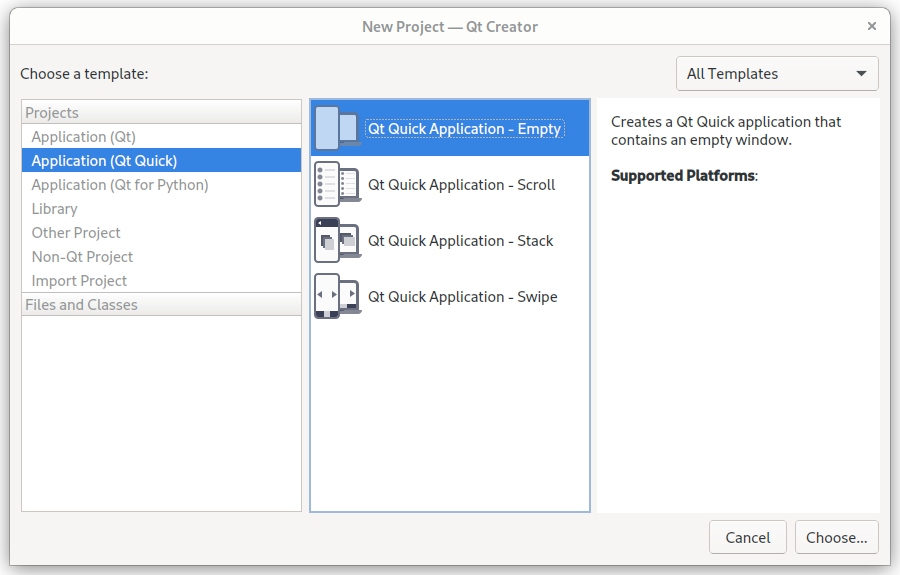
nix-shell -p cmake qt6.full qtcreator… got me Qt Creator, the Qt6 libraries, and CMake as a build system. This is already enough to get Qt Creator up and running, create a new QtQuick UI project in the project wizard with CMake as its build system, and actually build it using the UI menu buttons in Qt Creator, which was already a nice and uncomplicated user experience.

At first, Qt tried to use the wrong toolchain: I found out that my home folder
still had some older configuration state from an earlier Qt Creator version
installed.
Quickly running rm -rf ~/.config/QtProject* helped out:
Qt Creator chose the right Qt libraries the next time I ran the wizard.
Now it was able to build the app.
Unfortunately, running the application still produced the following output:
QQmlApplicationEngine failed to load component
qrc:/main.qml:2:1: module "QtQuick.Window" is not installed
qrc:/main.qml: module "QtQml.WorkerScript" is not installed
qrc:/main.qml:2:1: module "QtQuick.Window" is not installed
qrc:/main.qml: module "QtQml.WorkerScript" is not installed
After briefly researching this, it turned out that QtQuick apps require the
environment variable QML2_IMPORT_PATH to be set.
On computers where Qt is installed the normal way, this variable is already
set globally.
As there are plenty of Qt5 and Qt6 packages in NixOS already, we can just reuse
the scripts to get the same effect for our developer shell.
To get packages into the shell environment and add environment variables, the
function mkShell from nixpkgs can help us.
To manipulate more than the list of packages that are available in a nix-shell,
we need to set up a nix expression that describes the whole shell environment,
like this flake.nix file:
{
  inputs.nixpkgs.url = "github:nixos/nixpkgs";

  outputs = { self, nixpkgs }:
  let
    pkgs = nixpkgs.legacyPackages.x86_64-linux;
  in {
    devShells.x86_64-linux.default = pkgs.mkShell {
      buildInputs = with pkgs; [
        cmake
        gdb
        qt6.full
        qt6.qtbase
        qtcreator

        # this is for the shellhook portion
        qt6.wrapQtAppsHook
        makeWrapper
        bashInteractive
      ];
      # set the environment variables that Qt apps expect
      shellHook = ''
        bashdir=$(mktemp -d)
        makeWrapper "$(type -p bash)" "$bashdir/bash" "''${qtWrapperArgs[@]}"
        exec "$bashdir/bash"
      '';
    };
  };
}
I am not explaining everything in this article. Flakes in general are described in the nix documentation, and the
mkShellfunction is described in the nixpkgs documentation.
Running the command
nix develop… in the same folder as this flake file adds CMake, the full Qt6 library
package set, Qt Creator, the GDB debugger, and also runs the facilities from
nixpkgs that are used to equip Qt applications with needed environment variables
to the local shell.
We are not packaging anything yet, but running the nix develop shell with this
flake gives us a Qt Creator that can build, run, and debug our QtQuick
app.
(I found the shellHook part in the
NixOS Discourse)
If the
nix developcommand does not work for you, it might be the case that the nix “flakes” feature is not yet enabled by default on your system. To fix that temporarily, add--experimental-features 'nix-command flakes'to your command line, or have a look here to see how to enable flakes permanently.
Running nix develop for the first time will download everything that is needed
and can take some time depending on the internet connection.
Running it another time is instant.
Every collaborator on this project will have a much easier time developing this
package than with downloading, installing, and configuring Qt manually.
During the first run, the file flake.lock was created:
This is similar to lock files in other development environments.
When we give this project folder to a colleague and they run nix develop, they
will get exactly the same version as ours.
They will also be able to add more packages without having to rebuild the
environment as a whole (which is often the case with Dockerfiles).
The environment can now be updated using nix flake update, which is useful in
git repositories where you can first check out if the update works, and then
commit and push the change (updates and fixes in the same atomic commit).
Packaging the App
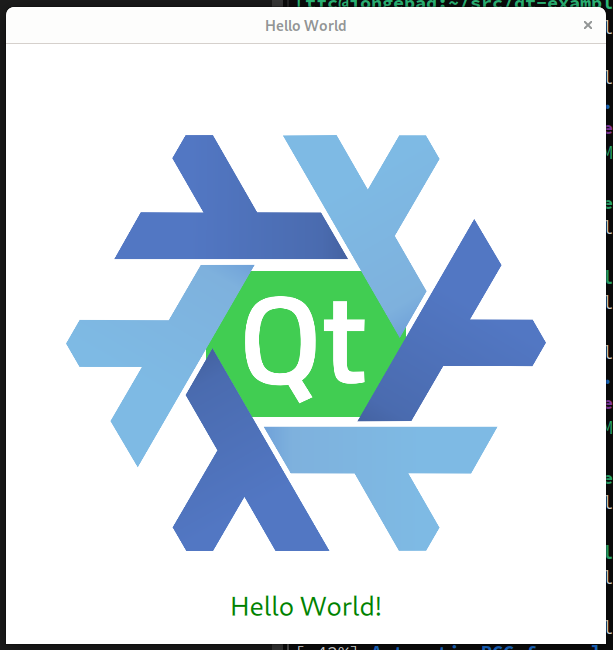
The example app that I prepared for this blog resides in the GitHub repo https://github.com/tfc/qt-example and looks like this:

Let’s assume this repository structure for now:
.
├── build.nix
├── flake.lock
├── flake.nix
├── qt-example # subfolder as created by the Qt Creator wizard
│   ├── CMakeLists.txt
│   ├── images
│   │   ├── nix.svg
│   │   └── qt.svg
│   ├── main.cpp
│   ├── main.qml # I only tweaked the window, see screenshot
│   └── qml.qrc
└── README.md
To package this app the nix way I wrote a build.nix file that looks like this:
{ stdenv
, qtbase
, full
, cmake
, wrapQtAppsHook
}:
stdenv.mkDerivation {
  pname = "qt-example";
  version = "1.0";

  # The QtQuick project we created with Qt Creator's project wizard is here
  src = ./qt-example;

  buildInputs = [
    qtbase
    full
  ];

  nativeBuildInputs = [
    cmake
    wrapQtAppsHook
  ];

  # If the CMakeLists.txt has an install step, this installPhase is not needed.
  # The Qt default project however does not have one.
  installPhase = ''
    mkdir -p $out/bin
    cp qt-example $out/bin/
  '';
}
Side note: The wrapQtAppsHook automatically wraps the application after the
build phase into a script that sets all needed Qt-related environment variables.
This way users don’t need to fiddle with env vars just to run our app.
This build recipe is separate from the flake.nix file because it only decides
what to do with given inputs to create a package but not where the packages come
from and how they are selected.
Our flake now calls this recipe like this:
{
  inputs = {
    nixpkgs.url = "github:nixos/nixpkgs";
  };

  outputs = { self, nixpkgs }:
  let
    pkgs = nixpkgs.legacyPackages.x86_64-linux;
  in {
    # This is our new package for end-users
    packages.x86_64-linux.default = pkgs.qt6Packages.callPackage ./build.nix {};

    devShells.x86_64-linux.default = pkgs.mkShell {
      # The shell references this package to provide its dependencies
      inputsFrom = [ self.packages.x86_64-linux.default ];
      buildInputs = with pkgs; [
        gdb
        qtcreator

        # this is for the shellhook portion
        qt6.wrapQtAppsHook
        makeWrapper
        bashInteractive
      ];
      # set the environment variables that unpatched Qt apps expect
      shellHook = ''
        bashdir=$(mktemp -d)
        makeWrapper "$(type -p bash)" "$bashdir/bash" "''${qtWrapperArgs[@]}"
        exec "$bashdir/bash"
      '';
    };
  };
}
You might have noticed that I removed all the buildInputs from the development
shell definition that are also already part of the package definition in
build.nix.
Instead, we get these inputs via the inputsFrom function that simply reuses
what’s defined in the list of packages that we assign.
We assign the pkgs.qt6Packages.callPackage ./build.nix {} call to be the
default package’s result.
(What’s also cool: Instead of using qt6Packages, we could also build a qt5
version of this recipe without changing it)
This way we can run
nix build… and get the pre-packaged application in the results symlink that nix
produced for us.
The best about this is that we do not need to run a nix-shell to run the app
(we needed to do this before because of the QML2_IMPORT_PATH environment
variable that is only set on systems where Qt is installed).
Even without cloning the repo at all, we can run get the app running on our desktop without fiddling with environment variables, installing Qt, or even knowing that the app runs with Qt or what Qt is:
nix run github:tfc/qt-exampleThe only prerequisite is Nix and an internet connection for the first attempt.
Limiting the target group to “nix users” and throwing them a
nix run github:... over the fence works, but still could take time to download
all the toolchain packages and build the application, which is a burden for
users who want it to just work immediately.
To reduce downloads and build times of toolchains and dependencies for building
the package, it is possible to cache the final build results.
Nix caches can be set up on any web server, but also nice tooling and services
like cachix.org exist which are even free to some
extent for open-source projects.
(Flakes can hint at caches so users don’t have to configure them manually)
Non-Nix Packaging

Of course, one could argue that just providing a nix flake for something, and telling them to configure some cache to be used, does not mean it is “packaged” now, and limiting the user base to nix users might be considered unacceptable even if nixpkgs is in the top 10 of GitHub projects and the biggest and most up-to-date package distribution in the world.
If we want or need to support non-nix users, we still can build Docker images, (cross-)compile our apps, and link them statically, etc. There is also nix-bundle, a tool that wraps the executable into another executable that unpacks itself with all dependencies at runtime. There is also Flatpak and AppImage. This is all possible (did these things in the past successfully for customers and friends) but out of the scope of this blog article. However, if you control the target platform (which most *aaS and embedded systems companies do), nix is arguably a great choice for your deployment cycles. No part of the project is nix-specific - we can ignore the nix files that we put into the repository. This way we could still use other tooling for packaging parallel to nix, but at least have simplified developer setup, workflow, building, testing, toolchain, and dependency updates, quite a lot.
Summary
Being a seasoned nix user, I came up with the initial nix flake in a few
minutes.
The final build recipe is some ~50 lines of nix code (following pretty much
standard patterns of the nix world), which might also be longer than your
average Dockerfile.
This first looks like a bigger and much more time-consuming step for nix
newbies, which is going to get better over time more and more nix-related
tooling is emerging in the last few years.
(One example is devenv, a new development environment
tool that aims to simplify project setup and more. I did not try it, yet.)
However, this got us not only a development environment but also a way to
package our app, and some more advantages:
As soon as we exit the nix-shell, we don’t have any Qt apps or environment variables polluting our global system scope. This means that we can have multiple Qt projects and (cross-)compilers (e.g. very new and very old ones) on the same system in different nix-shells. They will never interfere with each other and an update of one cannot influence the other.
The same flake.nix file works for different systems, regardless if it’s an
x86 or an ARM system (together with the small changes on the flake.nix file
that I pushed into the repository on GitHub but which I don’t explain in this
article to keep the scope crisp).
As long as you have nix installed, it will build and run the same way
everywhere.

With the flake.lock file, everything is pinned:
The project will still build in years on different machines and create the same
app.
Not only the same app is created, but it will be bundled with the same
dependencies (the whole stack from Qt down to the C library).
This means that it will not only build but also run the same way in many
years.
It will not happen any longer that something “works for me” on some coworker’s
computer, but not on a different machine, because they essentially have the same
packages (Although things might run differently for bugs that happen to be in
the macOS version of Qt and not in the Linux version or the other way around).
Updates are painless:
Run nix flake update to update all the nix package inputs, and commit the
new lock file (which happens automatically if you add the command line argument
--commit-lock-file).
If it doesn’t work because the update came with breaking changes, then fix it
and commit the changes together with the new lock file to have individual
atomic working commits on your main branch.
If you happened to like this article or need some help with Nix/NixOS, also have a look at my corporate Nix & NixOS Trainings and Consulting Services.