Technical documentation is tedious but important for every project. Hence, it should be easy to create, extend, and keep up to date. I tend to use the open-source tool MkDocs for projects. In this blog article, I share how to extend and package this tool with nice plugins that make documentation easier.
Documentation Tooling
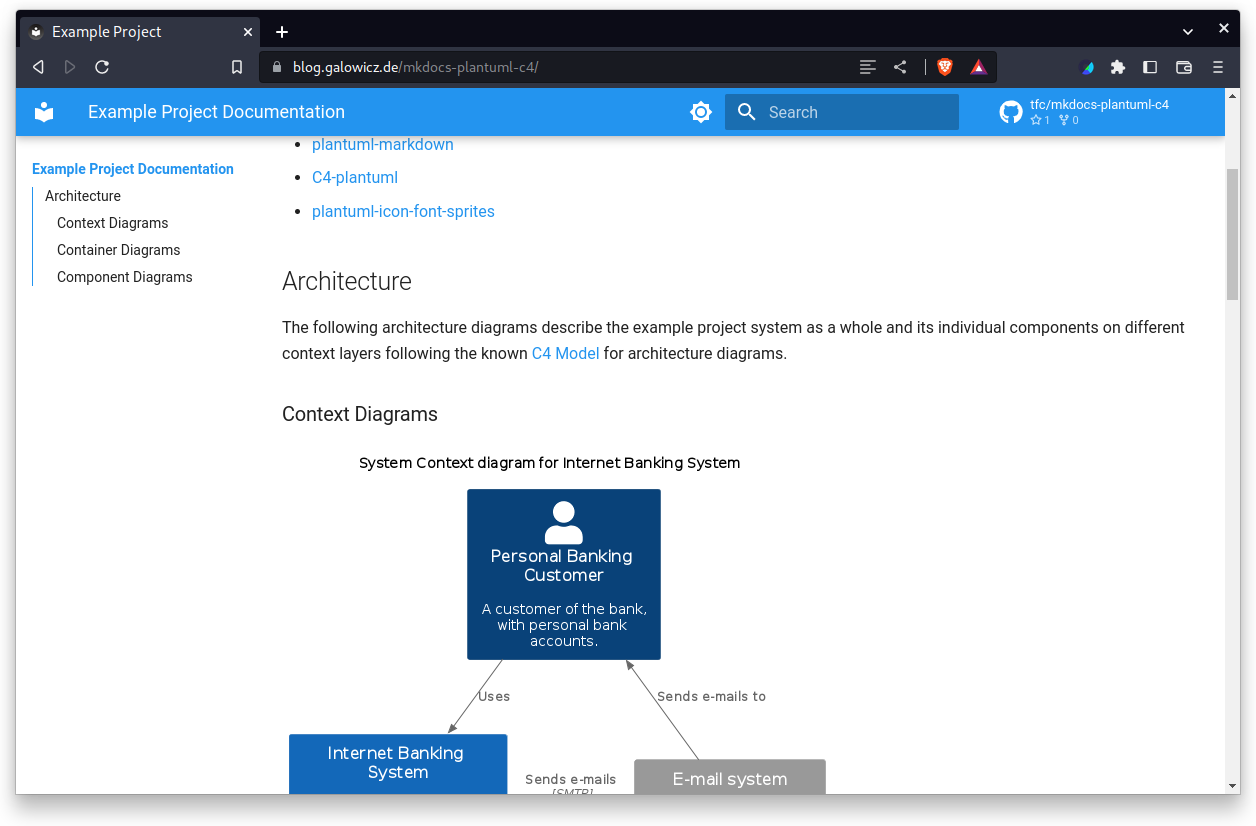
In many projects, I use tools to create documentation pages like this simplified one with some example content: https://tfc.github.io/mkdocs-plantuml-c4

The resulting documentation can be committed with the actual project’s code, which makes it easy to update in sync with technical changes. This way, changes in the documentation can also be nicely code-reviewed. It can be hosted automatically with CI/CD features like GitHub Pages or GitLab Pages.
Let’s first go through the list of tools in use. Then, we will have a look at how to make it easy to integrate them into a project and facilitate participation by all team members.
MkDocs
MkDocs is a language and framework agnostic static documentation site generator: You feed it with project documentation pages that are written in Markdown, and it converts them to HTML. The resulting HTML pages can be served from a single address, so everyone who wants to read the documentation can easily find it in its latest state.
In addition to that, MkDocs adds many useful little features:
- Search: Users can search for keywords and find the page they need, regardless of how large the project documentation is.
- Themes: Apart from matter-of-taste color choices, the MkDocs themes are responsive and provide dark mode, so they are nice to read on any device.
- Live Preview: Developers can work on the documentation and look at the result immediately after saving. MkDocs provides a mode that auto-reloads the browser page after any change.
MkDocs-Material
Seasoned MkDocs users typically add the very nice looking MkDocs-Material theme, which also adds building blocks for advanced styling and presentation, facilities to use well-known icons, embed social media, etc.
PlantUML
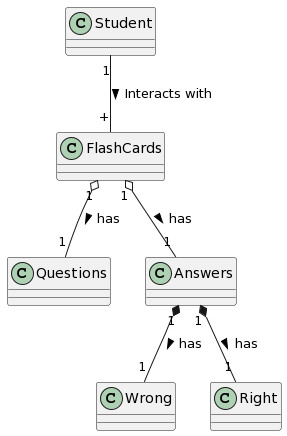
Different tools provide the capability to compile nice images from a semantic textual description, which makes them very easy to maintain and review. Many developers use Mermaid for this task, but I prefer PlantUML because it provides many more features and can be extended easily.

This image was generated from the following description:
@startuml

Class Student
Class FlashCards
Class Questions
Class Answers

Student"1" -- "+"FlashCards : Interacts with >
FlashCards"1" o-- "1"Questions : has >
FlashCards"1" o-- "1"Answers : has >
Answers"1" *-- "1"Wrong : has >
Answers"1" *-- "1"Right : has >

@enduml
Committed as code in a git repository, such images are easy to update with technical changes on the project itself, even without touching any graphics program.
PlantUML diagrams only rarely win beauty prizes, but the tool often really nails it regarding the effort, maintainability, and comprehensibility of the resulting images. There are some more nice examples to look at: https://real-world-plantuml.com/
PlantUML-Markdown
PlantUML does not come with markdown integration, so additional plugins must be used to enable MkDocs to automatically render images from inline text descriptions. PlantUML-Markdown is a plugin that extends the markdown processor’s capabilities by just that.
C4-PlantUML
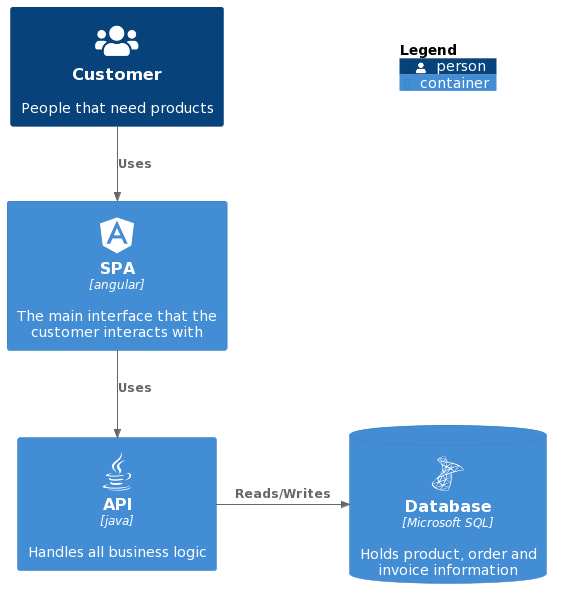
C4-PlantUML is an additional standard library that extends the PlantUML tool with comfortable functions that help create architecture diagrams that follow the C4 Model Style. The C4 Model is a great way to split down complex technical projects and create comprehensible, simple-to-grasp documentation of any project’s architecture.

I don’t know the C4 model for too long, but as soon as I used it, it made many discussions with stakeholders much more efficient and pleasant due to its clarity.
PlantUML-Icon-Font-Sprites
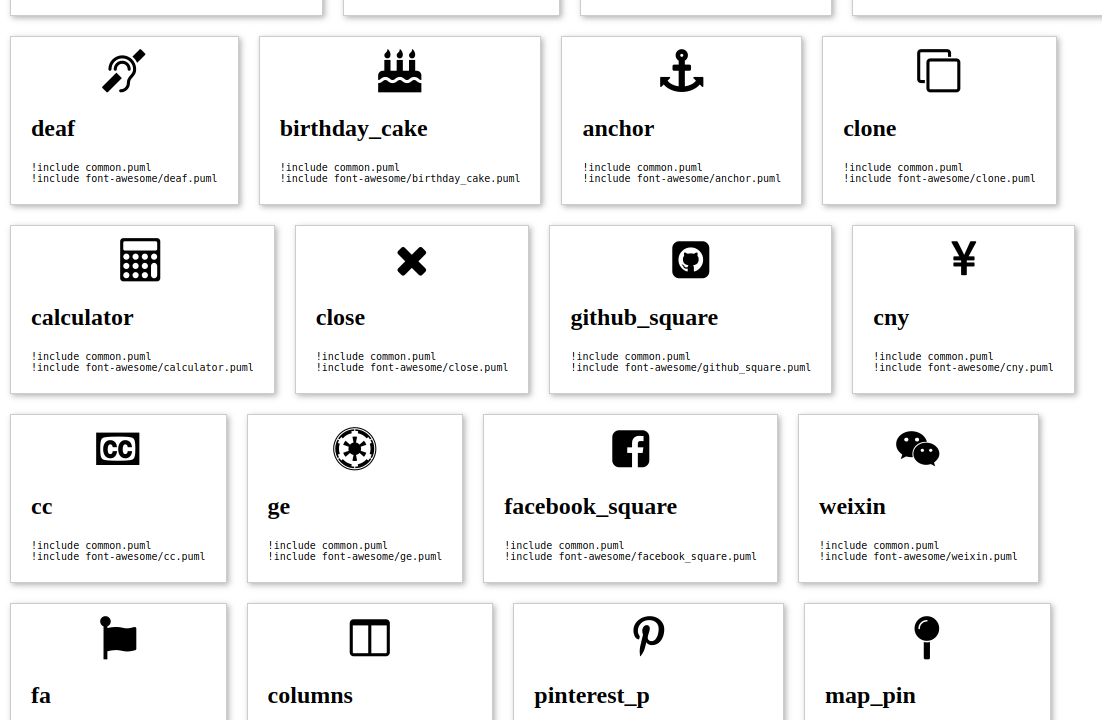
The PlantUML-Icon-Font-Sprites project defines thousands of well-known technology logos/icons as PlantUML sprites. This way they can be used to make every architecture diagram much more appealing.

It can seem superficial at times, but people like their icons in diagrams, which helps your attempts to lead a design process.
Automatic Markdown Linting and Spell Checking
The project also uses the pre-commit tool to check for spelling mistakes and markdown format smells before every commit. This is sometimes annoying but helped me avoid so many typos!
Setting up the pre-commit tool is another source of tedious work and brittle to maintain because it increases the amount of configuration before using it. With this project template, this turns out to be very easy as we will see.
Combining All the Tools/Plugins

Although the result looks nice, polished, and fully integrated, we are looking at a fragmented tool landscape: Different tools and plugins need to be installed on the computer of anyone who wants to participate in writing and rendering documentation. Many projects solve this by setting up the CI in a way that it has everything installed and configured to be able to process the raw documentation files. Developers who want to have a live preview would have to build and run some docker image, but as this is not part of the standard tooling, they most of the time wouldn’t. No matter how complex the functionality is that we want from our documentation tooling: It must not be difficult to maintain, so we need to get those moving parts together in a very solid way.
As I’m using nix in most projects anyway (It’s also easy to add to projects where nobody else is using it, because it does not interfere with the actual project files) for dependency management, let’s see how to quickly add all these MkDocs related tools and plugins to the project shell. I’m not going deep into beginner details so everyone who never used nix will understand. If you never used nix but would like to try it, you can have a look at some of my other blog articles that explain everything more from the start.
We will have a look at the most significant parts of the dependency management and skip the rest, which you can always look at and try out yourself in the original repository on GitHub: https://github.com/tfc/mkdocs-plantuml-c4
Let’s begin with the
recipe file build.nix
that puts all dependencies together, where the mkdocs command is called to
produce HTML from our docs:
# file: build.nix
{ lib, mkdocs, mkdocs-material, plantuml-markdown, python3, stdenv }:

stdenv.mkDerivation {
  name = "mkdocs-html";

  # allow-list filter for what we need: No readmes, nix files, source code
  # of the project, etc... --> this avoids unnecessary rebuilds
  src = lib.sourceByRegex ./. [
    "^docs.*"
    "^templates.*"
    "mkdocs.yml"
  ];

  nativeBuildInputs = [
    mkdocs
    mkdocs-material
    plantuml-markdown
    python3
  ];

  buildPhase = ''
    mkdocs build --strict -d $out
  '';

  # This derivation does no source code compilation or testing
  dontConfigure = true;
  doCheck = false;
  dontInstall = true;
}
There are many more MkDocs plugins online in the nixpkgs collection and they are easy to discover because the NixOS project has a package search page Simply add them to the list in this recipe to unlock them for use them in your MkDocs configuration.
This installs everything needed and can be put into our nix shell for maintaining and rendering docs during day-to-day development, so it is now very easy to have the live docs preview running on our laptop whenever changing the docs. But what is still missing is the additional C4 and icons library to PlantUML. It is not sufficient to simply install these as packages because to properly use them without knowing where exactly they reside, we need to override PlantUML’s import path resolution list. (PlantUML can download libs from the internet directly, but then we have no caching capabilities or checksumming, and it doesn’t work when we’re offline or have a hermetic CI like nix has by default)
I already upstreamed a variant of the plantuml package to nixpkgs
(this
is its recipe file) which can be installed instead of the normal package.
We didn’t have to add the plantuml package to our build.nix file earlier,
because the plantuml-markdown package already installs it transitively for us.
To make this package install our choice of plantuml, we can “inject” it into
the dependency list of the plantuml-markdown Python package:
python3Packages = (pkgs.python3.override {
  packageOverrides = pFinal: pPrev: {
    plantuml-markdown = pPrev.plantuml-markdown.override {
      plantuml = pkgs.plantuml-c4;
    };
  };
}).pkgs;
We used the python3 package’s override function to switch the
plantuml-markdown package’s plantuml input parameter to our version.
Overrides are a recurring and very useful pattern in the nixpkgs world.
The general concept is explained
in the nixpkgs documentation,
and there is also a Python-specific part of the docs,
which is worth reading when handling Python projects and packages.
Putting it all together now looks like this:
# file: flake.nix

...
html = python3Packages.callPackage ./build.nix { };
...
This line is embedded in the project’s flake file and allows us to run:
# Assuming we are in the project folder:
$ nix run .#html

# without checking the project locally to try this out right now, run:
$ nix run github:tfc/mkdocs-plantuml-c4#html
…which builds the HTML results from within any macOS or Linux or WSL shell. The flake file contains some more goodies, just have a look at the README.md file to see how to use more aspects of it.
Let’s get to the spell-checking and linting part.
Again with nix, this is very easy, as we just need to add the
pre-commit-hooks project
which provides some awesomely easy-to-use nix functions to our flake inputs:
# file: flake.nix

...
  inputs = {
    nixpkgs.url = "github:NixOS/nixpkgs/nixos-22.11";
    pre-commit-hooks.url = "github:cachix/pre-commit-hooks.nix";
  };
...
…and then configure the tooling:
# file: flake.nix

...
  checks = {
    pre-commit-check = inputs.pre-commit-hooks.lib.${system}.run {
      src = ./.;
      hooks = {
        cspell = {
          enable = true;
          entry = "${pkgs.nodePackages.cspell}/bin/cspell --words-only";
          types = [ "markdown" ];
        };
        markdownlint.enable = true;
        nixpkgs-fmt.enable = true;
        statix.enable = true;
      };
    };
  };
...
statix
and nixpkgs-fmt
are nix linter and formatting tools.
markdownlint watches typical
formatting mistakes in markdown files.
cspell is a spell checker that works on code files and
isn’t supported in the default tools list of pre-commit-hooks, but the project
makes it very easy to integrate external tools, as the few lines of cspell
config show.
Within a nix shell, running git commit now automatically runs all these tools.
If one of the tools finds some kind of violation, it will error out and give
the developer a chance to fix it before trying to commit, again.
Formatters automatically format the violating code pieces, so they can
comfortably be inspected and finally added via git add.
Summary
Following this guide seems elaborate, as the first setup did take some time.
But once this has been done for one project, this work can be easily reused
for all following projects by just copying the files and expressions.
We now have a relatively long list of packages that need to be installed in the
correct versions and configured properly, to produce nice documentation, and it
happens fully automatically:
On both developer laptops and a CI/CD pipeline, we just need to run
nix build .#html to build a project’s HTML documentation.
Especially in a corporate context where every project should follow a standardized way and style for documentation, it is thinkable to build an integrated Mkdocs-with-plugins flake using the flake.parts project. This way it would be possible to provide a standard documentation flake that other projects simply import and enable (which would be only two additional lines in each flake file instead of what we looked at in this blog article). If the central repository which defines the corporate documentation style is updated, all projects can update their flake input and follow.
The pre-commit workflow has been useful for me as the right mix of tools finds
so many mistakes.
cspell has been sometimes very annoying in that regard because I often
experienced that I had to add many words to the word list and ignore list, but
the number of typos that it also prevented really makes it worthwhile in my
eyes.
If you happened to like this article or need some help with Nix/NixOS, also have a look at my corporate Nix & NixOS Trainings and Consulting Services.